The Path to Your First Homebrew: Fermentation and Bottling

While each step of the brewing process is important and should be done with care, if you have gotten this far, you are in good shape. The only thing left to do is not screw it up.
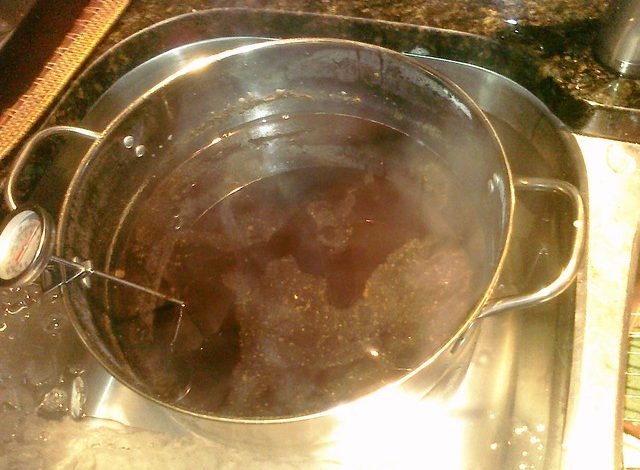
At this point, you should have already created the wort for your beer and cooled it. If you have not gone through these steps, go back to the first part of this and start there. From here, you will be moving your wort to let the science take place and preparing to enjoy it.
Transferring for Primary Fermentation
Once the wort has cooled, you’ll want to transfer it to your primary storage unit for fermentation. You may need to add water for topping your wort solution. If this is the case, be sure it is sterile. When your wort is at the appropriate level, you will take the initial gravity reading. Taking this original reading will help ensure successful fermentation and help determine the alcohol content of your brew.
For receiving accurate gravity readings, you will need a hydrometer and a container. It is best to find a hydrometer that comes with its own container since you will want something similar in size. A packaged deal will be your best bet. For the purposes of this article, I will not go into detail about the process of getting gravity readings. This is best understood by watching it done and should be observed. It remains essential that all of your equipment in this process is sterilized before being used with your wort.
Adding Your Yeast
Before you start brewing, it would be a valuable practice to pay attention to the health of your yeast. When you get to this point, you want to have your yeast ready to be added, or ‘pitched.’ You can achieve this preparation by letting the yeast sit out at room temperature for approximately three hours. Just like with the process of lautering to get all sugars into your wort, having a well-prepared yeast will give you better fermentation and better beer.
Brewing yeast comes in both liquid and dry forms. Each of these forms has its own pros and cons, but either will be effective for your brewing process. If you are using an ingredient kit, it is most likely that you will be using a dry yeast that has been included. All that must be done for this yeast is to make sure it is kept at room temperature. Liquid yeast will require what is called activation. This is done by shaking the container and perhaps creating what is called a yeast starter.
As long as your yeast is prepared, now is the time for pitching. Get it into the bucket or container you will use for fermentation and stir for aeration. Make sure you aerate the mixture to reintroduce oxygen for the fermentation process. Make an airtight containment by replacing the lid and use an airlock that can allow CO2 gases out of the container without allowing air to enter. Such devices can be found in homebrewing stores, and if you purchased a complete home brewing kit with a fermentation container, this device likely came with it. Make sure your airlock, along with the rest of this equipment was sanitized before usage.
Fermentation

This is where the beer is really being made. During fermentation, you don’t need to maintain the same watchful eye over the process as you did at such times like boiling or cooling the wort. But, of course, you want this to go smoothly, and it will remain valuable to keep tabs on how everything is moving forward.
Through fermentation, yeast is converting sugars to alcohol and carbon dioxide. The amount of time this fermenting process takes can be different depending on the kind of beer you are making. Brewers will often separate their fermentation process into two parts. Through this initial fermentation process, sugars are converting, and other particles will be separated from the beverage. One of your most important roles in this process is maintaining an appropriate temperature for the fermentation process to take place. The best temperatures to maintain are between 68 and 72 degrees Fahrenheit.
If you notice bubbling in your airlock chamber, that is a signal that the yeast is converting sugars, and CO2 is being released. If this does not happen immediately, do not be concerned. It will take some time for active fermentation to start, but if you do not notice this bubbling after a day or two, there may be a problem. When this bubbling begins to slow down, the initial fermentation process is coming to an end.
Secondary Fermentation
While not completely necessary, secondary fermentation plays a strong role in creating a more well-rounded beer. There liquid will have greater clarity and the balance more complete. With that said, there are risks in secondary fermentation, and if you’d rather skip it to play for safe fermentation, you should allow your initial fermentation to go on longer.
Transfering for the secondary fermentation is a delicate process. It must be done carefully to avoid contamination. This can be done through what is called racking, which is a siphoning process where gravity is used to move the liquid to a secondary container without introducing oxygen or disturbing the undesirable particles that have settled at the bottom of the container. Before attempting to use racking, be sure to find examples of this being done appropriately or have an experienced brewer teach you. If this is done incorrectly, it could ruin your entire batch.
If you elect to execute this secondary fermentation, it will allow the yeast to break down more sugars and improve the overall quality of your beverage. At least an extra week of time should be added to the process for your secondary fermentation.
Determining Alcohol Content
After fermentation has been given enough time to do its job, you can take another gravity reading to allow you to determine your beers’ alcohol content. The difference in the original gravity reading and the final gravity reading will tell you what the yeast has done and indicate how much alcohol it has created through the process.
I shouldn’t need to bring it up at this point, but as a safety precaution, I will remind you to sterilize all of your equipment before taking another gravity reading. This reading will be taken the same as the previous reading. Once you have the two numbers (assuming you wrote down and did not lose track of the original reading), you will be able to derive the alcohol content. To do this, simply subtract the final gravity from the original gravity and multiply the result by 131. For example, an original gravity of 1.045 minus a final reading of 1.010 gives you a difference of .035. That difference multiplied by 131 gives you an alcohol content (ABV) of 4.58%. Congratulations, you now know how dangerous of a beverage you have made and can moderate your consumption appropriately.
With all the science and math you had to make happen to get this far, there is still a bit more to do.
The final step will be in carbonating and conditioning. For this process, the beer can be kept in one of the containers you are probably most accustomed to seeing it in: bottles and kegs.
Many ingredient kits come with the things you need for bottling, so this decision might already be made for you. Bearing in mind that kegging is becoming more popular and might be a little easier with the extra volume in a single container, we will operate under the assumption that you will be bottling for your first time.

Bottling
Assuming you purchased a beginner’s ingredient kit, it should have come with everything you’ll be needing to finish off this process. I already know that you’ll have everything sanitized that you know will touch the beer, so I won’t bring that up again.
First, add your priming sugars to your bottling buckets and then rack your beer from the secondary fermenter into the bucket as you did from the primary fermenter. From there, you’ll use your tubing with the spigot to move your beverage from the bottling bucket to the bottles themselves. Be careful not to let them get too full and overflow.
Cap the bottles off and store them in a cool, dark place. Two weeks is generally considered good enough for your beer to carbonate and condition. The remaining yeast will ferment the priming sugars that you added to get this final job done. While two weeks is generally accepted, some recommend allowing extra time for conditioning and sometimes even specifically cold conditioning.
Whichever way you decide, before you crack open the first beer of your own making, be sure to remind yourself of the work and time that went into it. Appreciate the process that you’ve gone through and be proud of finishing the job off right. Take a sip. Enjoy the fruits of your labor. Then, start thinking about what style of beer you will work with next.


