How to Grow Your Own Hops
If you are truly looking to take your home-brewed beer or microbrewery to the next level, consider growing your own hops. The quality and taste of beer relies heavily on the variety of hops used in the brewing process. For brewers who want to exert more control over their beer, growing your own hops is a natural next step.
Growing hops isn’t as tricky as you might think, plus it could save you money while crafting your beer. In this article, we’ll guide you through the process of growing hops for use in brewing at home or for your microbrewery. But first, let’s start with why hops are so crucial in beer crafting.
Why Are Hops Important In Beer Brewing?
While hops are not necessary to complete the beer brewing process, this ingredient has an essential job in the development of flavor. When yeast, water, and malted barley come together to brew beer, the results are generally sweet and can lack in the flavor department. To balance flavor and add depth, brewers will often add hops to their beer brews. Some brewers will use alternative herbs or spices, but hops tend to be the ingredient of choice.
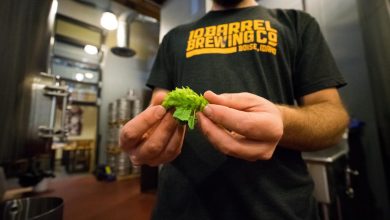
But what are hops exactly? Hops are the flowering portion of the Humulus lupulus plant that is commonly associated with defining a beer’s bitterness. But this flowered ingredient also offers a few other benefits in beer brewing:
- Hops can help beer retain its head (foam) longer.
- The freshness of beer is often boosted through the use of hops.
- Hops help to enhance and define a beer’s flavor outside of the yeast and malted barley.
- The aroma of a finished beer is often determined by the hops used in brewing.
Hops do not contribute to a beer’s alcohol content, as is commonly thought. Instead, brewers will often increase the strength of their brews to match higher hop usage.

Choosing Which Hops to Grow
The type of hops used will have a significant impact on the flavor of a beer. That being said, there are quite a few different varieties of hops to choose from. Before you get started growing your own hops, you’ll need to determine which variety will work best for the beer being brewed. During your selection process, you will be choosing which rhizomes to grow. Rhizomes are a portion of a hop plant’s root system, from which a new hop plant can be grown.
The list of hop varieties is continually growing and can leave you feeling overwhelmed; there are over 80 different kinds to choose from. To help make the decision process easier, we’ve listed some of the most popular hops used by brewers today below:
- Cascade Hops – Commercial brewers and homebrewers alike widely use cascade hops. The wide availability of this hop variety and its capability to work well with IPAs and American pale ales make it a popular choice. Cascade hops often add a fruity and spicy taste to beer.
- Chinook Hops – Chinook hops are known to increase beer’s bitterness and add a unique earthy flavor. Winter ales, stouts, American pale ales, IPAs, and more work well with this hop variety.
- Centennial Hops – Centennial hops are citrus-heavy in both taste and aroma. Brewers often use Centennial hops when brewing IPAs, bitter beer, and pale ales.
- Columbus Hops – Columbus hops are best used for beers that require a bold bitter flavor. IPAs, pale ales, and imperial-style beers often use the Columbus hop variety.
- Crystal Hops – When brewers are looking for a spicy and earthy flavor to be added to their beer, they’ll usually turn to Crystal hops. IPAs tend to work well with Crystal hops.
- Fuggle Hops – Belgian ales, IPAs, red ales, and English ales often feature Fuggle hops. Mint, wood, and earth are flavors usually featured in this hop variety.
- Goldings Hops – Sweet and floral flavor and aroma can be added to beer through the use of Goldings hops. Brown ales and porter-style beers are often brewed using Goldings hops.
- Magnum Hops – Magnum hops are generally used for pale ales, stouts, and IPAs. Brewers appreciate the subtle and nuanced herb and pine flavors featured with this hop variety.
- Northern Brewer Hops – Northern brewer hops are traditionally used for bittering. This hop variety features flavors and aromas of pine, wood, and mint, and is often used to brew ales and lagers.
- Sterling Hops – Citrus and floral notes are featured with Sterling hops. Many brewers gravitate towards using this hop variety because it works well with a broad range of beer styles.
- Tettnanger Hops – Tettnanger hops feature full and bold notes of earth and spice. Brewers tend to use this hop variety for lagers, wheat beers, and various German-style ales.
- Zappa Hops – Named after musician Frank Zappa, this hop variety works best for milkshake IPAs and pale ales. Brewers can expect bold fruity and minty flavors out of this hop variety.

Growing Hops Outdoors
Once you have chosen and purchased the rhizomes for the hop variety chosen, it’s time to start planting. To get started in establishing your new hop crop, simply the steps below:
- Choose the Location – Your hop plants should be positioned in an area that will allow room to grow. The vines of hop plants can grow pretty steep, with some topping out at 25 feet or more. Because of their vertical growth needs, and because their roots tend to spread out, your plants should be spaced at least five feet apart and with ample room to grow upwards.
- Prepare the Area and Soil – You will want to prepare the area for growth prior to planting your hop rhizomes. Be sure to till the area to allow for planting at least four inches into the ground. For soil, a sand and clay mixture typically works well to support hop growth. This soil combination will promote a healthy nutrient environment, while also allowing for proper drainage.
- Plant Your Rhizomes – Rhizomes can thrive in a variety of temperatures, making them a relatively easy crop to maintain. That being said, try to plant your rhizomes between February and April when the soil is easy to work with. Your hop rhizomes should be planted about four inches down into the ground and covered with a healthy layer of mulch for protection.
- Water – Upon planting your rhizomes, you should give them a healthy watering. The soil should feel moist to at least two inches deep. Hop plants are not intensely picky when it comes to watering schedules, but you’ll want to make sure that in the first year they are provided with an adequate amount regularly. Following the first year, be sure to keep the soil most consistently by at least two inches deep. Many professional hop farmers utilize drip irrigation systems for retaining soil moisture at a healthy level and reducing the hop stems and flowers from getting too wet.
- Trim and Maintain – To maintain good growth and reduce pests and diseases, keep your hop plants trimmed. Trimming is also key to keeping hop plants growing vertically instead of horizontally. If needed, use a pole or post to help train your plants to grow in a vertical direction. At times, you may need to also introduce a fungicide or herbicide into the hop growth process to keep mildew and pests at bay.
It’s important to note that it’s not generally recommended for hop plants to be grown indoors. Hop plants require a good amount of space to grow correctly and quickly become frustrating if grown indoors.
Harvesting and Storing Hops
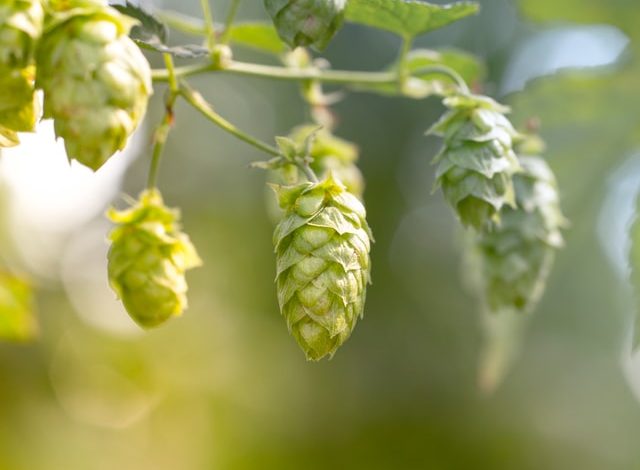
The harvesting and storage of matured hops plants can be done in a few different ways. Generally speaking, hops are ready to harvest in late summer to early fall. The cone portion of the plant that’s being harvested will indicate that it’s ready when it’s green in color, fragrant, and has brown outer edges. Inside the cone, you may also notice that it’s yellow and sticky.
Following harvesting of the hop cones, you will need to determine how you want to use and store them. Using freshly-harvested hops is becoming increasingly popular with brewers; however, traditionally, most brewers use dried hops. Fresh hops can add unique and bold flavors to beer, but dried hops are a little more consistent in flavor and easier to work with during the brewing process.
If you are drying your harvested hops, a food dehydrator or well-ventilated oven can be worth the investment. During the drying process, be sure that temperatures don’t exceed 140 degrees Fahrenheit. It’s also important that the cones are moved and “fluffed” each day to dry their interior portions evenly. The entire drying process should be complete in about three days. Once drying is complete, dried hop cones are best stored in sealed plastic bags and frozen to maintain freshness until they’re needed. It’s not recommended to refreeze hops once they’ve been defrosted for use; this can cause a build-up of moisture and loss of flavor.